“Elevating Beadwork: Silversmithing Techniques for Stunning Designs”
Step into the enchanting world where ancient craftsmanship meets modern innovation, as we embark on a journey through the intricate artistry of silversmithing intertwined with the delicate beauty of beadwork. Guided by the wisdom of a master silversmith and artisan of beads, our exploration unveils the meticulous techniques and timeless traditions that breathe life into sterling silver, transforming it into luminous beads, clasps, and charms. Join us as we delve deep into the heart of this age-old craft of jewelry making, where creativity flourishes, and tradition dances in harmony with innovation, crafting stunning jewelry pieces that transcend mere adornment to become works of art. Within this realm, different Type of Beads, like Pony Beads and Millefiori Beads, add unique textures and colors, enriching the tapestry of our creations with their distinct charm and character.
Mastering Silversmithing Techniques
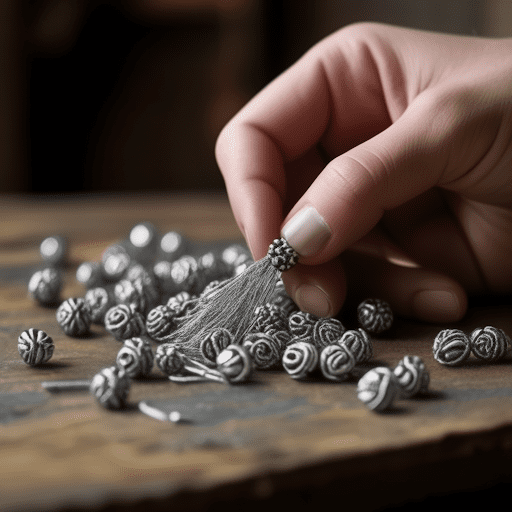
Silver holds a timeless allure, a testament to generations of artisans. Yet, it’s in the fusion of silversmithing with beadwork that true magic ignites. Mastery begins with precise torch control, heating silver metal to the perfect temperature for crafting. Soldering, akin to painting with fire, seamlessly joins pieces. But it’s not just about hefty works; delicate silver beads, findings, and charms emerge, each a miniature marvel. Picture a necklace, where silver seed beads dance with vibrant hues, epitomizing the enchantment of this artful union. What is a seed bead? These tiny beads, often used in beadwork, add intricate detail and texture, enriching the overall design with their subtle elegance and versatility.
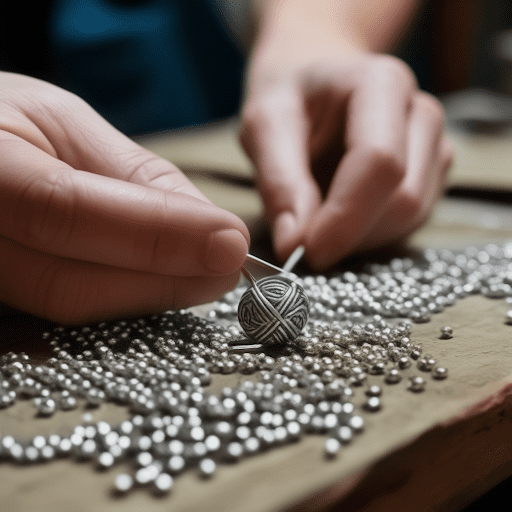
Forging Sterling Silver Beads: Exploring the Ancient Art of Forging Silver into Exquisite Beads.
Fire and finesse, that’s the name of the game when it comes to forging silver beads. It’s an age-old technique, but the results are timeless. Here’s what you need to know:
- Preparing the Silver: Start with high-quality sterling silver wire or sheets of silver metal. Cut it into small, manageable pieces based on your desired bead size. Heat the metal with a torch until it reaches a cherry red glow. Use calipers to ensure consistent sizing throughout your batch.
- Shaping the Bead: This is where the magic happens! You’ll use specialized hammers and anvils to shape the hot silver into a round bead. It takes practice to develop the right strike, but don’t worry, the satisfaction of seeing that perfect sphere emerge is worth it.
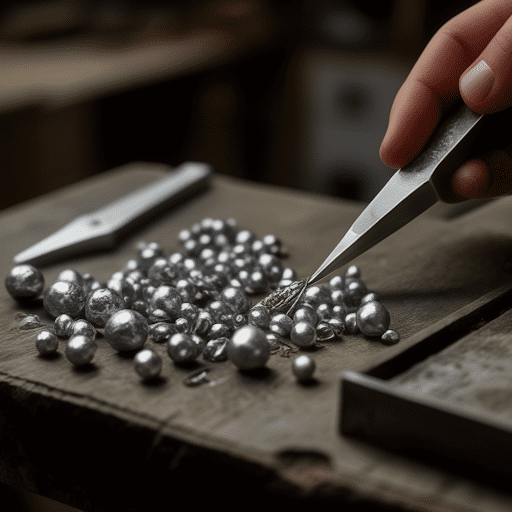
- Drilling the Hole: Once your bead is cool, you’ll use a drill with a tiny bit to create a hole for stringing. Precision is key here, a wonky hole can ruin the whole bead.
- Finishing Touches: The final step is smoothing and polishing your little silver treasures. A rotary tumbler with stainless steel shot will give them a beautiful shine. You can also use sandpaper or polishing cloths for a more rustic finish.
Soldering Clasps and Charms: Delving into the Precise Technique of Soldering to Create Durable Clasps and Charms.
Soldering might seem like a fancy word, but it’s basically the art of using molten metal to join two pieces of silver permanently. It’s what allows us to create secure clasps and all sorts of amazing little charms for your jewelry making designs. Here’s a breakdown:
- Preparing the Surfaces: Cleanliness is crucial! Make sure your silver pieces are free of dirt and oil for a strong solder joint. You can use a pickle solution or a simple baking soda slurry to achieve this.
- Applying Solder Paste: Solder paste is a magical mix of tiny metal particles and flux, a substance that helps the solder flow smoothly. Apply a small amount to the areas you want to join.
- Heating with a Torch: This is where things get exciting! Heat the metal with your torch until the solder paste melts and flows, creating a seamless bond between the pieces.
- Cooling and Cleaning: Once the metal cools, you can quench it in water to speed up the process. Then, use a pickle solution or a stiff brush to remove any fire scale (a μαύρος [mávro̱s], Greek for “black” discoloration) that might have formed.
Remember, practice makes perfect with soldering. Don’t get discouraged if your first few attempts aren’t museum-worthy, keep at it and you’ll be creating sturdy and beautiful clasps and charms in no time!
Innovative Approaches to Beadwork
Elevate your beadwork by infusing it with innovation and creativity, exploring new Beadwork Techniques such as Bead Netting and Bead Crochet. Break free from tradition by incorporating silver beads with gemstones or polymer clay, unlocking a realm of design possibilities. Embrace negative space, allowing silver beads to stand out against delicate fabrics, adding a sense of airiness and dimensionality. Explore unconventional methods like embroidery or canvas art, where beads serve as rivets or dimensional elements, pushing the boundaries of traditional beadwork into new, exciting territories of jewelry making.
Wire Wrapping Silver Accents: Elevating Beadwork with Intricate Wire-Wrapped Silver Accents.
There’s something truly magical about the way a delicate wire can be coaxed into swirling tendrils and elegant loops, cradling a bead like a tiny treasure. Wire wrapping is an amazing technique that lets you create stunning silver accents to take your beadwork to the next level. Here’s a peek:
- Choosing Your Wire: The right wire makes all the difference. Sterling silver is a classic choice, but don’t be afraid to experiment with colored craft wires or even fine copper for a touch of warmth. The thickness will depend on the size of your beads and the complexity of your design.
- Mastering the Basics: There are a few fundamental wire wrapping techniques that are your foundation. Learn how to make a simple loop, a wrapped loop, and a spiral – these are the building blocks for endless variations. Once you’ve got those down, the creative possibilities explode!
- Incorporating into Beadwork: This is where the fun really begins! Use your wire-wrapped elements as spacers between beads, create delicate dangles for earrings, or even fashion tiny cages to hold gemstones. The way you integrate these silver accents is entirely up to your imagination!
Engraving and Etching Techniques: Adding Depth and Character to Silver Beads Through Engraving and Etching Methods.
Silver may be beautiful in its simplicity, but there’s a whole other level of artistry you can unlock with engraving and etching. These techniques allow you to add personalized messages, intricate patterns, or even tiny nature motifs to your silver beads, imbuing them with a unique story.
- Engraving: This involves using a sharp tool called a burin to carve designs directly into the silver surface. It requires a steady hand and a good eye, but the results can be incredibly detailed and elegant.
- Etching: Here, you use a chemical solution to eat away at the silver, creating a recessed design. It’s a fantastic way to add texture and depth to your beads, and it allows for more intricate patterns compared to engraving. There are different etching methods, so you can find one that suits your comfort level.
- Combining Techniques: The beauty of these methods is that they can be used together! Imagine a bead with a hand-engraved floral motif that’s then highlighted with a touch of etching. The possibilities for creating truly one-of-a-kind silver components for your beadwork are endless!
Quality Materials for Exceptional Designs
Quality materials are essential for elevating your beadwork to the next level, especially when delving into intricate techniques like Bead Embroidery, Right Angle Weave, and utilizing Beadweaving Looms. Sterling silver findings, preferably recycled for eco-friendliness, serve as reliable workhorse metals. Experiment with various gauges to find the perfect fit for your designs. Invest in high-quality beads, including seed beads, crystals, gemstones, and polymer clay pieces, ensuring consistent sizes and finishes for a polished look. Opt for durable silk or beading thread like Nymo or KO to prevent fraying or breakage, particularly with smaller beads. With top-notch materials, your creations will shine with professionalism and allure, ready to showcase the beauty of your craftsmanship.
Selecting High-Quality Silver Metals: Tips for Choosing the Finest Silver Metals to Enhance Jewelry Creations.
When it comes to silver, not all that glitters is gold… Well, silver actually! There are different grades and qualities, and for your stunning creations, you want the best. Here’s what to keep an eye on:
- Sterling Silver Hallmark: Look for the “.925” stamp – that’s your guarantee you’re getting real sterling silver metal, which is 92.5% pure silver and 7.5% alloy metals for strength. Don’t settle for anything less!
- Source Matters: If you’re feeling eco-conscious (and you should!), try to find recycled silver. It’s just as beautiful and good for the planet. Many reputable findings companies offer this option these days.
- Considering Finish: There are different silver finishes to play with – shiny, oxidized (a fancy term for darkened), or antiqued. Think about how the finish will complement your design. Maybe a bright, polished silver clasp would be perfect for a necklace with sparkly crystals, while an oxidized clasp might add a touch of vintage charm to a piece with earthy gemstones.
Incorporating Gemstones into Beadwork: Enhancing Beadwork with the Beauty of Gemstone Accents.
Ah, gemstones! Those little bursts of color and light can take your beadwork to a whole new level. Here’s how to use them like a pro:
- Choosing the Right Gemstone: Consider the size and shape of your beads. Delicate seed beads might pair well with tiny faceted gemstones, while larger lampwork beads could handle a bolder cabochon cut. There are no hard and fast rules, but think about scale and balance.
- Color Harmony: Think about the color palette of your beadwork. Do you want the gemstones to be a complementary pop of color, or do you want them to blend seamlessly? There are endless possibilities, from a rainbow explosion to a sophisticated monochromatic look. Color theory can be your friend here, but don’t be afraid to experiment and create something unique!
- Beading Techniques: There are many ways to incorporate gemstones into your beadwork. You can string them directly onto your thread, weave them in with your beads, or even bezel them with wire-wrapping techniques we talked about earlier. The method you choose will depend on the size and shape of the gemstone and your desired final look.
Reviving Ancient Techniques in Contemporary Designs
The beauty of beadwork and silversmithing is that they have these rich histories, these whispers of artisans from centuries ago. And let me tell you, there’s magic to be found in breathing new life into those old techniques! Here’s how you can weave a little history into your modern masterpieces:
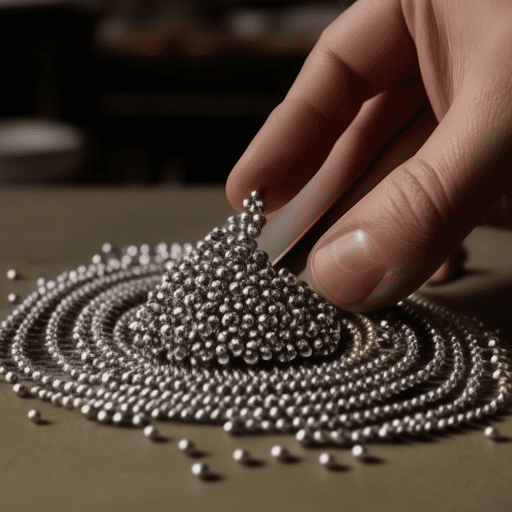
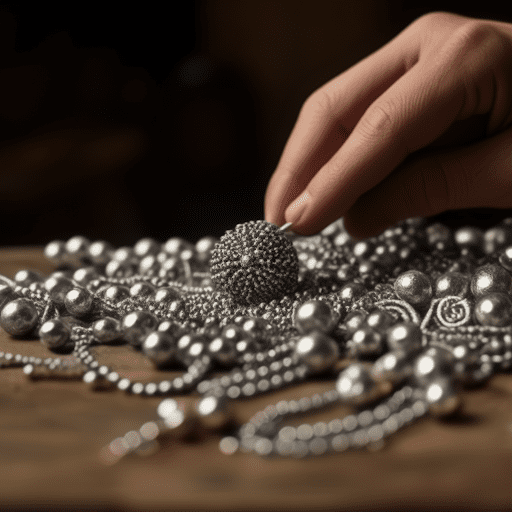
- Granulation: This age-old technique involves adorning your silver pieces with tiny, tiny spheres of silver. It adds a touch of texture and sparkle, and it’s surprisingly achievable with the right tools! Imagine a necklace with a sleek, modern pendant, but then BAM, the edges are decorated with this delicate granulation – a beautiful contrast of old and new.
- Filigree: This one involves using fine silver wire to create intricate lace-like patterns. It’s a labor of love, but the results are breathtaking. You could use filigree to create a delicate pendant focal or even tiny little dangles for earrings. The possibilities are endless!
- Inspiration from Antiquity: Don’t be afraid to delve into historical designs for inspiration! Check out museums or browse online for art from ancient Greece, Rome, or even farther back. You might find a geometric pattern, a nature motif, or a symbolic shape that speaks to you and can be incorporated into your beadwork with a contemporary twist.
Rediscovering Lost Silversmithing Methods: Delving into Forgotten Techniques to Infuse Modern Designs with a Touch of History.
There’s something truly special about unearthing an old technique, a forgotten secret from the silversmithing toolbox. It’s like finding a hidden treasure map, and let me tell you, the results can be incredible! Here are a few lost arts to consider:
- Keum Boo: This fascinating Korean technique involves fusing thin sheets of gold foil onto silver. Imagine a sleek silver pendant with geometric patterns of gold inlay – a stunning East-meets-West fusion that whispers of ancient artistry!
- Niello: This one involves filling engraved silver designs with a black sulfur compound, creating a dramatic contrast. It’s perfect for adding depth and a touch of mystery to your pieces. You could use niello to highlight nature motifs or even create tiny inscriptions on your silver beads.
- Mokume Gane: This Japanese metalworking method involves layering different colored metals and then forging them together to create stunning patterned slabs. You can incorporate these patterned sheets into your designs by cutting them into tiny shapes and weaving them into your beadwork. The possibilities for unique patterns and textures are endless!
Innovative Fusion of Old and New: Blending Ancient Silversmithing Traditions with Contemporary Design Principles to Create Captivating Beaded Jewelry.
The beauty of this art form lies in the magic that happens when you bridge the gap between centuries. You can take those time-tested techniques and weave them into something fresh and exciting. Here’s how to get that creative spark going:
- Modern Materials, Ancient Inspiration: Don’t be afraid to experiment! Maybe you incorporate Keum Boo with gold leaf, but instead of a traditional geometric design, you use a contemporary art deco pattern. Or perhaps you use niello to create tiny lightning bolt symbols on your silver beads for a touch of edgy, modern flair.
- Think Outside the Box: Silversmithing techniques can be applied to more than just silver! Imagine using Keum Boo to adhere tiny flakes of shimmering mica onto your beadwork, or even incorporating niello into specific sections of your bead stringing thread for a touch of surprising detail.
- Embrace the Unexpected: Sometimes the most innovative designs come from happy accidents. Don’t be afraid to experiment and see where the fusion of old and new techniques takes you. You might just stumble upon a signature style that’s uniquely your own!
REFERENCES
- [Source: John Bricker, The Complete Modern Metalsmith, Thames & Hudson, 2010]
- [Source: Melanie Venditti, The Beading Book: Techniques & Projects for Creating Handmade Jewelry, Quarry Books, 2019]
- [Source: Rio Grande’s Jewelry Making Essentials, Rio Grande, 2021]
- [Source: Tim McCreight, The Complete Metalsmith: Techniques, Projects & Inspiration for Jewelry, Metal Arts & Sculpture, Lark Crafts, 2011]
- [Source: Tim McCreight, The Jeweler’s Workshop: Creative Techniques for Beading, Metalsmithing & More, Lark Crafts, 2013]
- [Source: Lisa Pavelka, The Wire Wrap Bible: Techniques & Projects for Creating Handmade Jewelry, Lark Crafts, 2011]
- [Source: Sherri Warner Liefer, The Beginner’s Guide to Engraving & Metalworking, Fox Chapel Publishing, 1999]
- [Source: The Spruce Crafts, How to Identify Silver Jewelry Hallmarks, https://www.925-1000.com/]
- [Source: Heather Powers, Korean Metalwork: From the Earliest Times to the Nineteenth Century, British Museum Press, 1996]
Recent Comments