The Art of Millefiori: A Beginner’s Journey into Glass Bead Crafting
Introduction
What is Millefiori?

- Millefiori is an Italian term meaning “thousand flowers”.
- It is a glassmaking technique that produces distinctive decorative patterns on glassware.
- The technique involves the production of glass canes or rods, known as murrine, with multicolored patterns which are viewable only from the cut ends of the cane.
- Murrine are then arranged and fused together to create a variety of patterns.
- Millefiori is thought to have originated in ancient Egypt, but it was perfected in Murano, Italy, during the Renaissance.
- Millefiori glassware is still produced today, and it is highly sought after by collectors.
- Millefiori glassware is often decorated with floral patterns, but it can also be used to create geometric and abstract designs.
- Millefiori is a versatile technique that can be used to create a wide variety of objects, including beads, vases, bowls, and jewelry.
History and Origin of Millefiori
- The origins of millefiori can be traced back to ancient Egypt, where glassmakers developed the method of fusing together colored glass rods or canes to create intricate patterns.
- From Egypt, the millefiori technique spread to other parts of the Mediterranean, including Greece and Rome.
- In the 15th century, Venetian glassmakers revived and refined the millefiori technique, creating exquisite beads and other decorative objects.
- Millefiori beads were highly prized by royalty and nobility throughout Europe, and they continue to be popular today.
How are Millefiori Beads made?
- The technique involves the production of glass canes or rods, known as murrine, with multicolored patterns which are viewable only from the cut ends of the cane.
- Murrine are then arranged and fused together to create a variety of patterns.
Types of Millefiori Bead making techniques
Millefiori beads are renowned for their intricate designs and captivating beauty, often resembling intricate mosaics crafted from glass.
Traditional Millefiori

- The most common millefiori technique involves creating colorful canes, which are elongated rods of glass with embedded patterns.
- These canes are meticulously formed by fusing together rods of different colored glass, carefully shaping them into the desired design.
- Once the canes have cooled, they are precisely sliced into thin rounds using a sharp knife.
- These rounds, resembling vibrant glass coins, serve as the building blocks for crafting millefiori beads.
Encased Millefiori

- Encased millefiori takes the technique to another level by encasing millefiori beads within a layer of clear glass.
- This method adds depth and dimension to the beads, creating a captivating three-dimensional effect.
- The clear glass encasing amplifies the vibrant colors of the millefiori patterns, allowing the intricate designs to shine through.
Shaped Millefiori

- While millefiori beads are often associated with the classic round shape, the technique offers versatility in creating beads of various shapes.
- Skilled artisans can manipulate the glass canes to form beads in a variety of styles, including squares, ovals, and even more intricate shapes.
- This versatility expands the creative possibilities of millefiori beadmaking, allowing for the creation of unique and eye-catching pieces.
Millefiori Mosaic

- Millefiori beads can also be used to create stunning mosaics, transforming glass into a captivating medium for artwork.
- By meticulously arranging and fusing millefiori beads, artisans can create intricate designs, patterns, and scenes, reminiscent of traditional mosaics.
- The vibrant colors and intricate details of millefiori beads bring a unique dimension to mosaic art.
- Millefiori, with its rich history and diverse techniques, remains a captivating and enduring art form.
- The intricate patterns and vibrant colors of millefiori beads continue to inspire artisans and collectors worldwide, ensuring that this ancient technique continues to bloom and flourish.
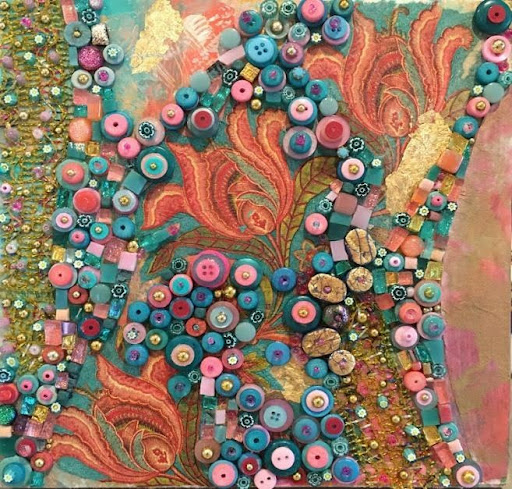
Playing with Millefiori Beads

- Jewelry Making: Millefiori beads are commonly used in creating unique and vibrant jewelry pieces. They can be incorporated into bracelets, necklaces, earrings, and anklets, adding a colorful and artistic touch to the accessories.


- Bead Embroidery: Millefiori beads can be stitched onto fabric to create intricate bead embroidery designs. This is often used in making decorative items like handbags, clothing embellishments, or even wall art.
- Mosaic Art: Millefiori beads are excellent for mosaic projects. The colorful patterns and designs can be arranged to create eye-catching mosaic tiles or decorative pieces for tabletops, mirrors, and other surfaces.

- Home Decor: Decorative items such as lampshades, candle holders, and vases can be adorned with millefiori beads, adding a touch of artistic flair to home decor.
- Keychains and Accessories: Millefiori beads can be used to create stylish keychains and accessories. By stringing them together or attaching them to metal findings, you can make personalized and colorful items.

- Wire-Wrapped Designs: Millefiori beads can be incorporated into wire-wrapping designs. The beads can be wrapped with wire to create pendants, focal points, or elements in larger wire-wrapped jewelry pieces.
- Beaded Sculptures: Advanced artists often use millefiori beads in creating intricate beaded sculptures. These sculptures can range from small figurines to larger art installations.
- Mixed Media Art: Millefiori beads work well in mixed media art projects, where different materials are combined to create unique pieces. They can be used alongside clay, resin, or other artistic mediums.
- Crafting with Polymer Clay: Millefiori beads can be embedded in or applied to polymer clay creations, such as pendants, beads, or small sculptures, adding a pop of color and pattern.
- Educational and Therapeutic Activities: Millefiori bead crafting is often used in educational settings and therapeutic activities. The process of creating intricate patterns and designs can be both calming and engaging.
- Gift Making: Handmade gifts featuring millefiori beads add a personal touch to presents. You can create custom jewelry, ornaments, or other decorative items for friends and loved ones.
- Beaded Wire Art: Millefiori beads can be incorporated into wire art, where they are woven or wrapped into wire designs to create intricate and visually appealing patterns.
Tips and Tricks for Making Millefiori Clay Beads
Materials and Tools
Polymer clay in a variety of colors (we’re using clay here, not glass).
- A bead roller or pasta machine
- A sharp knife
- A toothpick or skewer
- A bead mandrel or a round object, such as a pencil
- Baking soda
- An oven
Conditioning the Clay
- Before you start working with your clay, be sure to condition it well. This will make it easier to work with and prevent it from cracking.
- To condition your clay, knead it until it is soft and pliable. You can also use a clay conditioner or a pasta machine to help you.
Creating Millefiori Canes
- When creating millefiori canes, be sure to use thin layers of clay. This will make it easier to roll and slice the canes.
- To prevent the clay from sticking to your work surface, you can use a little bit of cornstarch or baby powder.
- If you want to create a specific pattern, you can use a template or cut out shapes from paper.
- Create the canes
- Choose three or four colors of clay that you want to use in your design.
- Roll each color of clay into a long, thin snake.
- Twist the snakes of clay together to create a variegated cane.
- Repeat steps 2 and 3 to create as many canes as you want.
- here a tutorial link which helps understanding the process on making canes
Slicing the Canes
- When slicing your canes, use a sharp knife or blade. This will give you clean, even slices.
- If you are having trouble slicing your canes, you can try chilling them in the refrigerator for a few minutes before slicing.
Forming the Beads
- When forming your beads, be sure to use a smooth, even surface. This will prevent the beads from cracking.
- You can use your fingers or a bead roller to form your beads.
- If you want to create a specific shape, you can use a bead mold or a template.
- Arrange the slices.
- Before you start working with your clay, be sure to condition it well. This will make it easier to work with and prevent it from cracking.
- To condition your clay, knead it until it is soft and pliable. You can also use a clay conditioner or a pasta machine to help you.
- Create the bead
- Roll out a piece of clay into a thin sheet.
- Wrap the sheet of clay around the mandrel, covering the slices of cane
- Use your fingers to smooth out the clay and remove any air bubbles.
Baking the Beads
- When baking your beads, be sure to follow the instructions on your clay packaging.
- Overbaking your beads can cause them to crack or burn.
- Underbaking your beads can make them soft and pliable.
- Preheat your oven to 275 degrees Fahrenheit (135 degrees Celsius).
- Place the bead on a baking sheet lined with baking soda.
- Bake the bead for 30–45 minutes, or until it is hard and cool to the touch.
Finish the bead
- Once the bead is cool, you can sand it lightly to smooth out any rough spots.
- You can also apply a coat of sealant to protect the bead and give it a shine.
Troubleshooting
- If your clay is too sticky, you can add a little bit of cornstarch or baby powder.
- If your clay is too dry, you can add a little bit of clay conditioner or water.
- If your beads are cracking, you can try baking them for a shorter period of time or at a lower temperature.
- If your beads are not baking evenly, you can try rotating the baking sheet in the oven.
Recent Comments